Showing posts with label DIY. Show all posts

Wednesday, January 28, 2015

Nursery on a Budget

When we found out we were pregnant, I immediately started mentally planning the nursery.  I didn't really have a budget, but I knew I wanted to do it as inexpensively as possible, because I'm kind of cheap.  I ended up spending under $400.  What?!  Yes, I seriously decorated our nursery for less than $400.  And I think it's pretty darn cute.

So, how did I do it?  Well, lots of bargain hunting, lots of DIYing, and a pinch of resourcefulness.  Here's the details.  Well, except without the exact sources, because well, new baby = not much blogging time.  So, if I can't do it in ten minutes while my husband finishes watching Justified or with one hand on my phone, it's not going to happen.

Let's start with the crib.  I did what every single book tells you not to do.  I bought a used crib.  From someone I knew and trusted.  Someone I knew had kept up with all recall information.  That allowed me to score a gorgeous crib for a fraction of the price.  Now I feel like you could go buy a new crib from somewhere around the same price from Ikea.  Definitely functional.  Cost:  $125 (including mattress)

Crib skirt.  Oh, this was a doozie.  My mom sewed it for me.  It turned out to be a gigantic pain of a project.  My sewing skills are definitely not this good.  But it turned out amazingly!  We picked up the fabric on sale at JoAnn's and my poor mom spent hours upon hours sewing it.  Fun fact, the base is made out of table cloths from my wedding.  Cost: $30 (and countless hours my mother will never get back.)

Mobile.  This bad boy took a couple hours of crafting but I think was well worth it.  It's a wire wreath form that I painted gold.  And a ton of coral and gold dots I punched out using two different sizes of circle punch.  The dots are stuck onto thread with glue dots.  And then the mobile is hung with ribbon I already had on hand.  Cost:  $6 (or so)

Chevron art.  I already had all the paint on hand for this.  It just required buying a canvas, taping it off and then painting.  Easy peasy.  Cost:  $8

Tall bookshelf.  This bad boy was free.  My dad built it for me back when I was in college.  It stayed in the nursery for a bit of extra storage space.  I'm envisioning diaper storage and some pretty folded baby blankets.  Cost:  Free

Tree decal.  I picked up this up at Target on clearance upon suggestion from a friend.  I wasn't really sure I wanted it.  Even as I was putting it up, I wasn't too sure.  But now I'm in love.  So glad I ponied up the six bucks and change.  It's the perfect little detail.  Cost:  $7

Gallery wall.  This was super cheap to put together.  The mint canvas with the heart, I made.  The big frame came from Ikea and the name decal came from PolkaDot Wall stickers.  That's probably the most expensive decoration I bought.  The two small pictures were my mom and aunt's when they were little girls and were the inspiration for my color scheme.  The 8x10 frames are also from Ikea.  The small scalloped frame, you guessed it, Ikea.  And still needs a picture put in it...  The 11x13 frame is from Walmart but it doesn't count because I already had it.  Cost:  $60
My changing table/dresser was a gift from my parents.  This project started out as a total disaster.  I found a dresser on Facebook that was $30.  I was going to refinish it.  Well, my dad went to pick it up and it was a total piece of crap.  My mom felt so bad about it that she went on a mission to find me a different one.  Mission complete.  They found a gorgeous dresser and my dad refinished it for me.  And then wouldn't let me pay them for it.  I picked up the drawer knobs on a 50% off sale at Hobby Lobby  Cost:  Gift/Drawer Knobs $18

Rocking chair.  I got it last summer at a garage sale.  I think it barely even counts.  Just to be fair though, I'll count the measley amount I spent on it.  It rode home in the trunk of my car.  I'm classy like that.  Cost:  $8

Curtains.  I picked these up at Ikea for less than $20 for the pair.  They're the perfect layer of texture.  I love them so much!  I got the gold curtain rod at Walmart for about $8.  Not too shabby.  Cost:  $28

Blinds.  Okay, these are from Ikea too.  Are you noticing a trend?  Like maybe a big Ikea shopping trip to complete our nursery?  It may have happened.  So these curtains are amazing.  I just measured my window and then cut the blinds with SCISSORS, yes scissors.  All at once.  Pretty amazing.  And even better....  Cost:  $6 (for both blinds!)

Lamps.  This is another example of me being cheap.  There was a light fixture that I looooved.  But I felt like it was silly to spend that much on a light fixture that I might not use that much.  And silly to pay an electrician to come run wiring for an overhead light when lamps would do just fine.  See, cheap.  So, I pulled an old "Work with what you've got" and just had my dad spray paint lamp bases that I already had.  Then I grabbed a bottle of gold craft paint I already had and a Q-tip and just painted those cute little dots on my lamp shades.  Cost:  Free

The small bookshelf I've had for years.  Either my dad or my grandpa built it.  All the books came from my baby showers.  It's great to have lots of teacher friends!  And the adorable elephant was a Christmas present from my sister-in-law.

 Since I like spreadsheets, here's a breakdown of the costs and where everything came from.
ItemCostSource
Crib/Mattress$125.00Garage Sale
Dresser/Knobs$18.00Hobby Lobby
Rocker$8.00Garage Sale
Curtains/Rod$28.00Ikea/Walmart
Blinds$6.00Ikea
Lamps0Repurposed
Bookshelves0Repurposed
Gallery Wall$60Walmart, Ikea, heirloom
Tree Decal$7Target
Mobile$6.00DIY
Paint$70Sherwin Williams, Amour
Chevron Art$8DIY
Crib Skirt$30.00DIY
Total$366.00

 And there you have it.  A nursery for under four hundred bucks.  Not too bad. 

Monday, January 19, 2015

Nursery

Well I've been busy growing and having a baby. Our sweet little girl will be three weeks old tomorrow. I can't believe it!  But after a months long hiatus, I'm back. Or at least back enough to show off our nursery. It's quickly become my favorite room in our house. I'll be back later with all the details, but for today it's just pictures. iPhone pictures because let's be honest, it's easier to snap a few quick pictures with my phone in one hand and the baby in the other. 


And now I'm back to baby snuggling. 

Wednesday, July 9, 2014

A Living Room Update

Well, I've been sort of stumped.  I had some changes I wanted to make to the living room but I just couldn't come up with what I wanted.  I knew the mantle area needed some updating, but I was stuck.

So, this is what we had going on.
  
Well, a while back anyway.  It was the best picture I could find.  It was fine.  But the mirror had been up there as long as we've lived here and I was ready for something new.  That's when my next problem came into play.

My dad made me this great wooden toolbox, exactly like the one my grandpa had carried when he was a construction worker.  So, it's very cool.  And I love it.  I just didn't know what to do with it.  I finally grabbed some white hydrangeas at Hobby Lobby and some floral foam and I'm pretty happy with how it turned out.  So I switched that out for the mirror on the mantle.
Pretty good, but it still needs something...  And if you're curious, that's a pheasant tail you're seeing over on the left.  My husband went hunting in South Dakota a while back and for this year's Christmas present I had his pheasant (that had been in my deep freeze for the past year) mounted.

So, the other day I was at JoAnn's picking up supplies for the cupcakes I'm baking for my sister's wedding and I saw these giant letters.  I knew I needed one.  Amazing and cheap.  I just didn't know where it was going to go or how I was going to jazz it up.   My brilliant husband says "Why don't you put it up above the fireplace"  Oh man, that's exactly why I married him.

I painted the whole thing gold with some craft paint I had on hand.  Then I grabbed my mod podge and gold glitter and headed to the deck.  The deck is the perfect place to glitter.  No glitter trail in my house.  I don't know why I never thought about it.  After my glitter had time to dry, I shook off the excess, my giant H came back inside the house to get hung on the fireplace.  I just used a 3M tab.


Have I mentioned I love summer vacation?  I've gotten so much done, it's great!  I'll be back soon with more of my summer projects.

Monday, April 14, 2014

A Couple of Tiny Projects

My parents came up this weekend which meant it was project time.  My dad and husband replaced the back door to our garage.  It's so nice to have a door that's solid and not completely scary looking on the inside.

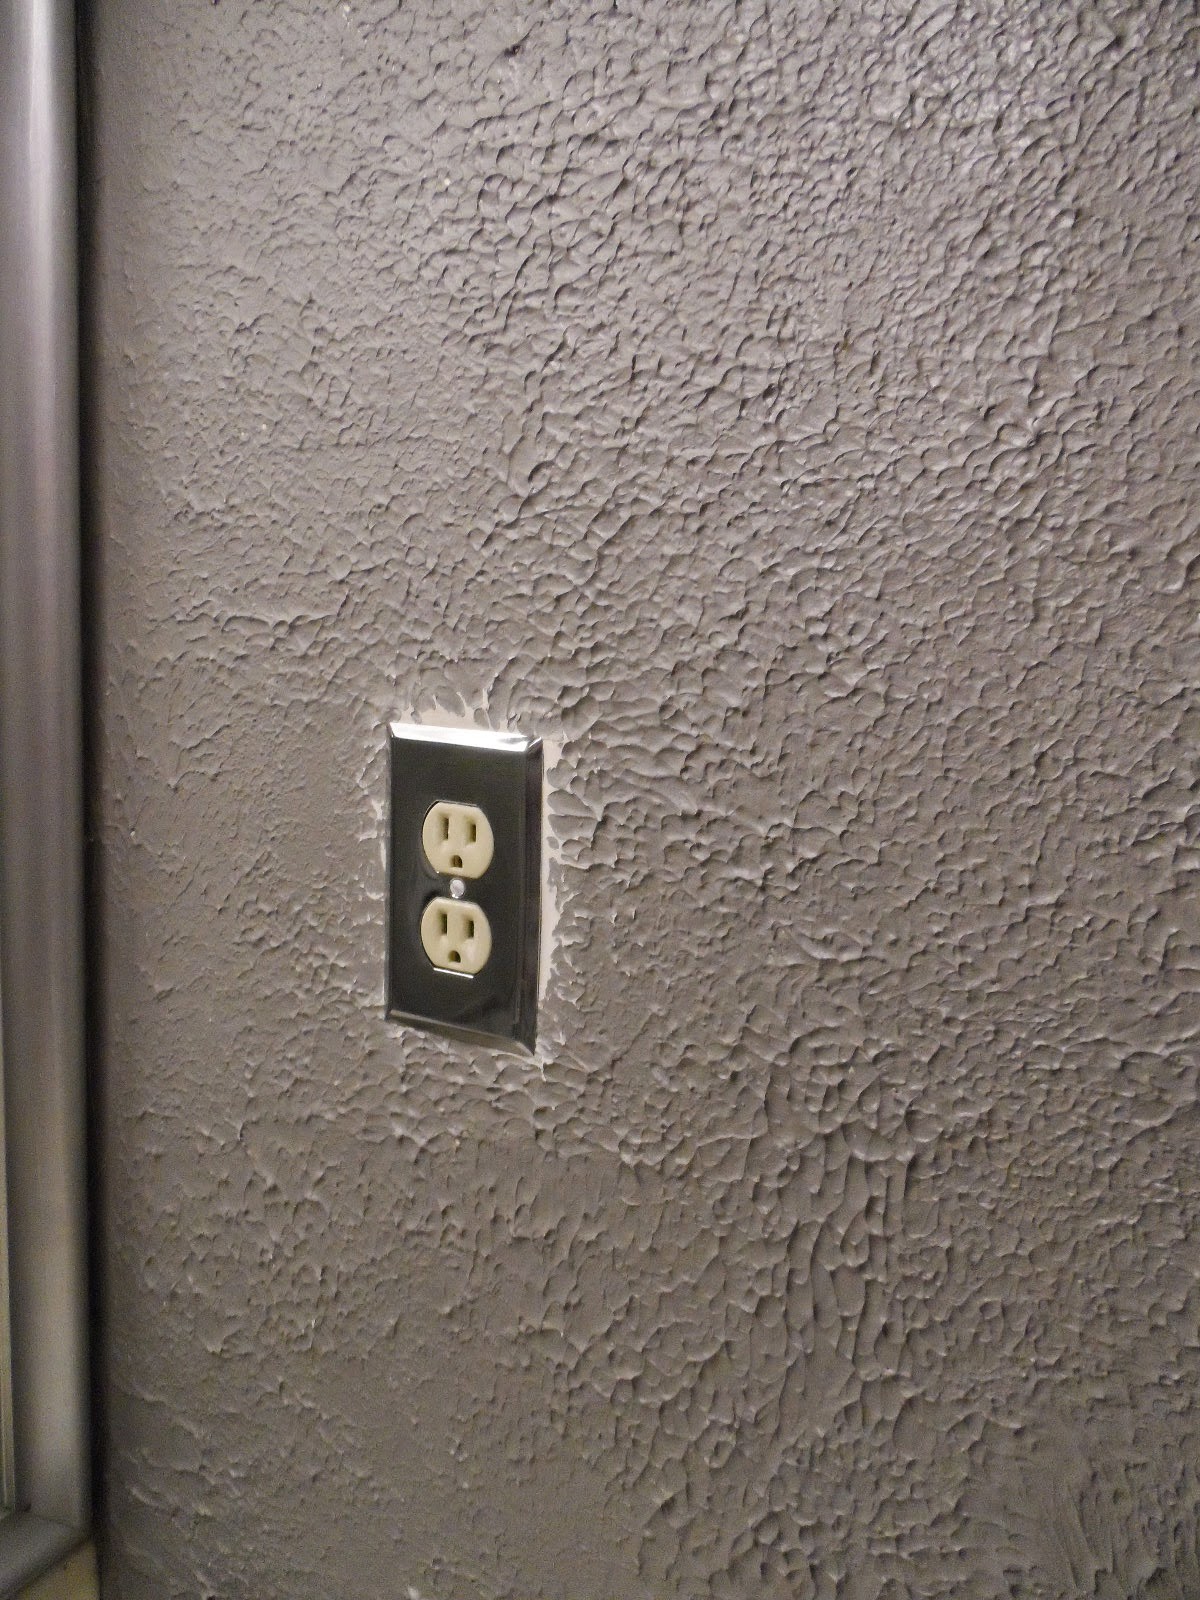
And they did a couple of other little inside projects.  Remember when we installed our new bathroom sink and we found an outlet behind the mirror.  That beautiful little outlet has been sitting naked for over a year because the outlet was recessed too far into the wall.  I bought an outlet cover and it's just been hanging out on a shelf.  So, my dad did a little tweaking and now....
So I need to touch up the paint from where I sanded the wall down.  But, so much better.  It had been driving my mom crazy ever since I got the wall painted.  So, now it's fixed.

Then there was another bathroom project.  When we first moved in, I installed a towel bar above the toilet.  It looked like this.
Cute, right?  Well, we never used the towels.  Like ever.  And they were always dusty.  We hang the towels we actually use on hooks in our master bathroom.  So I had a plan cooking in my head...  My dad was done with everything else I had on my list, I mentioned my idea to my mom and she went out and told my dad what I wanted done....

Notice something missing?  The towel bar is gone!  Now I'm left with a big empty space.  Oh, and that clock is gone.  It hadn't worked right for.... um, months.  The time on it was never right so it's gone too.  You can't see it, but there are 12 holes drilled with hollow wall anchors in them, just waiting....

For these bad boys to be finished.  I'm going to install three shelves up the wall with L brackets.  They just need to get painted.  You may be thinking, L brackets?  If you've ever priced the fancy decorative shelf brackets, they're crazy expensive.  Or I think they are, especially for what they are.  So, I used some small L brackets on our laundry room shelves and it has worked great so we went the same route.  I didn't make the hardware store trip, but I saw the amount online when I checked my bank account, around $15 for six brackets and a 6 foot long 1x8 board.  Not too shabby!  And I already have paint on hand.

So, these are getting painted this week and will go up by next weekend hopefully.  I can't wait!  And if I can find something reasonably priced, I'm going to put three towel hooks on the back of the bathroom door so we can quit carrying our towels around.

What were you guys up to over the weekend?  Anybody else tackling those tiny things on their to do list that have been lingering?

Thursday, October 17, 2013

Basement Sneak Peak

It's a tiny sneak peak.  The tiniest of sneak peaks...  And not even an accurate one.  I did some serious work last night.  My husband got off work early yesterday so we celebrated by grabbing Chipotle for dinner and doing some work on the basement.

So, I mentioned that I was going to paint the workbench area.  It was dark and disorganized and pretty much a giant mess where we couldn't find anything.
And somehow it looked even worse in person.  Just super dirty.  And dark.  Probably the darkest corner of the basement.  We had stuck up one of those weird fake battery powered light bulb things.  Well, I ran down to the basement last night and it had fallen completely off the ceiling.  Good thing I had already bought a new light.

So last night we worked on painting part of the shelves.  And installing my new light.  I had initially thought we could just use regular screws to mount it to the beam directly above the workbench.  Um, turns out that beam is metal.  So we got creative.  It's super rigged, but my light is up and the corner is so much brighter!  I just picked up one of those fluorescent lights that you plug in, like people often use in the kitchen under the upper cabinets.  Of course there's no outlet at the workbench so the cord runs across the ceiling to an outlet on the other side of the room.  It gets the job done though.

And a third of my shelves are painted.  This picture is just my start from the other night.  The top two shelves are painted now as well.  I'm working in sections so that I don't have to dump everything off into the floor.  I'm hoping to get the whole workbench finished this week/weekend so that I can tackle other parts of the room.  

Then there is going to be sweeping.  A whole lot of sweeping.  I had to sweep the shelves off before I could even wipe them down.  I'm pretty sure they had never been cleaned.  So gross!  And then I'm going to sweep the crap out of that floor.  I can't even think about how gross it is.

What have you guys been up to?  Anybody else tackling any kind of gross projects?

Tuesday, September 24, 2013

Kitchen Ideas

Yesterday while I was at the gym I was watching Love it or List it.  I kind of hate that show.  But they were working on a kitchen on this particular episode.  And that got me thinking about our kitchen.  We don't have tons of cabinet space.  And we definitely don't have a pantry.  We have a lazy susan cabinet that has some food in it.  The top cabinet to the right of the stove has food in it.  And then I keep cereal and stuff in a bottom cabinet by the dishwasher.  So, it's pretty much scattered all around the kitchen.  It's fairly ridiculous.

So, I'm kind of thinking I can build (with the help of my dad) a pantry.  We have a floor to ceiling cabinet beside the stove.  It has the vent for the furnace, the stove, or something.  I don't really know.  I just know it's a big pipe...  I store the broom, the mop, our lunch boxes, and food wrap in there.  The upper part of that cabinet has hot pads, my cookbook rack, and my food scale. 
Okay, so there's the cabinet beside the stove.  And I'm kind of thinking I could build a pantry on the same side of the kitchen but beside the fridge.  I think it would kind of cap things off perfectly.  It wouldn't be quite as big as this cabinet.  But it would be perfect pantry size.  And it could also house our trash can I think.

So see, there's just this extra space there on the side of the fridge.  And the wall is just kind of awkward.  It might just be the storage solution I've been looking for.

Even from the front it looks unfinished.  And I hate walking into our house and seeing that trash can.  Not the most attractive thing ever.  I could even do chalkboard paint on the side for my weekly menu.  Or make it magnetic or something so that it was still totally functional.

What do you think?  Anybody else tried adding on to your cabinetry?  I'm also thinking this might mean I could reface all of my cabinets to get rid of that super 70-ness.  Now I just have to convince my dad and my hubby that this is a good idea.

Monday, September 9, 2013

A Not So Boring Board

Since I've been on this weight loss journey, I've decided I need a real life inspiration board. A cute one. To post things like a skinny picture and a fat picture, to you know, remind me where I am and where I want to be. Also some little inspirational quotes, my exercise calendar, and my weight loss countdown.

Well my mom got me a Hobby Lobby gift card so Saturday I headed for the city and Hobby Lobby.  I looked around for quite a while, I just wasn't sure what I wanted. A gift card is so much pressure, I always feel like I have to get something really good.

Then I spotted a bulletin board I liked. It wasn't colors or even the pattern I really wanted but it gave me an idea.


I remembered a really cute painting I ad seen on Pinterest. Kind of an abstract herringbone kind of thing.  Like this one or this one.  So I grabbed a medium-ish bulletin board and paint in three shade of pink and coral.  

I spent Saturday night painting my bulletin board. The coral I bought ended up being more orange than I had thought so I just mixed it with some pale pink until it was the color I wanted. Then I just kind of randomly painted and blended colors on my bulletin board until I was happy with how it looked.

Fast forward to Sunday. Herringbone time! I sat down to watch the Chiefs game with my husband (and my roll of frog tape). I started in the bottom left corner and jut eyeballed the pattern. If you're going to try this, be prepared, it's going to take a while. Like about half of a football game. I did take a break for some diet Cranberry Sierra Mist (the true sign of fall at our house) and summer sausage.

One it was taped off, I was ready to make my pattern shine.  I'm not usually into gold but I thought it would be perfect with my color pallet. Pretty sure I made the right choice. So I grabbed my gold spray paint and gave the whole thing, frame and all, a light coat of gold spray paint. And then I ran out :(  So I had to run to Dollar General and grab another can. I got home and gave it a second coat.

I also spray painted some cheap clear push pins gold for a little extra flair. And I figured I already had the supplies on hand, so why not.

After the second coat it was time to pull all that tape off. I would recommend doing this on a day it's not a hundred degrees, I was standing in the shade sweating as much as I did during my workout this morning. Anyway, the tape came off easy peasy.  And this is what I was left with.


I'm super happy with how it turned out. And the whole project came in under twenty bucks. It would've been even cheaper if I had just used paint I already had. I can't wait for it to finish off gassing so I can get it hung up.

How was your weekend? Anybody else tackle a simple project that was crazy time intensive?

Tuesday, August 20, 2013

Impulse Painting

I think I may have a problem.  Instead of eating junk food when I get home from work, I've developed a painting problem.  Oops.  So today I got home from work, ate some dried apricots and drank a glass of water.  Then I rode my exercise bike for 4 miles while watching Gilmore Girls and then I read some blogs.  Oops.

My friend Crystal over at 29 Rue House just painted the inside of her door this gorgeous green.
So I tell her how amazing it is and that now I kind of want to paint the inside of our door turquoise.  She says "Go for it."

I vaguely think for a while that maybe I should talk to my husband before I did it.  Then I threw caution to the wind, deciding that I could always paint it back to brown.  So, now I'm looking at one coat of turquoise on my door.  It definitely needs a second coat but I think I like it.  Now I'm just waiting for him to get home and see what he thinks.
Before.  I like the brown, but the front hall is sooooo dark that it felt like a cave at night with the door that color.

During.  One coat of turquoise.

I think I like it a lot.  And now after sitting in the floor, I realize I need to sweep my floor very badly.  And maybe buy a rug that is a color to help with the brown situation.  The walls are not as fleshy as they look.  They're really a light tan.

Anybody else have impulse DIY problems?  No?  Just me?  Okay.  Just checking.  Stay tuned for the second coat.  And the husband verdict on the turquoise door....

Friday, July 26, 2013

Updated House Tour

Okay guys, I went crazy.  I just spent the last..... huge amount of time updating my house tour.  We've made so much progress and nothing makes me happier than looking back to see how far we've come.  Okay, other things totally make me just as happy (if not happier):  cupcakes, going to the lake, girl time, doing actual DIY project, baking, and my husband.

So, anyway.  There are a crazy amount of pictures, so get ready.  This post also lives under the House Tour tab.

I go back to work on Monday so get ready for some pictures of my updated office in the upcoming days.  I'm busy spray painting frames as we speak (as I write....)  Anyway.  House Tour Go!

Exterior

The front of the house (east side)

There is a door into the front hallway just to the right of the garage.  There is also a door into the kitchen just to the right of the bay window.  Definite charm.  Just ignore the terrible sidewalk.

Not exactly the same angle, but a thousand times better than when we bought our house.  And I need to touch up the paint on the bay window.  It suffered a little during shrub removal.

The side of the garage (south side of house)

There is a huge flower bed here filled with yucca plants and river rock.  There was also a huge dead cactus that we chopped out.  FYI: cactus do not live well in Missouri.

The back of the house (west side)

If you're paying attention, all the shutters are not the same color.  It's ridiculous.  Sadly this has not changed yet.  It's on the list though.
A fresh coat of paint and it's so much prettier.  We still need to tame those bushes a bit, but still, so much prettier.

The north side of the house.

More oddly colored shutters.  There is also a patio under the top deck.  The boards that look out of place on the deck are closing off that side of the deck because a pool used to set there.  
Paint, stain, some new pavers to expand the patio and it's a whole new house from this side.

Interior:  Main Floor

Dining Room

We just walked in the door by the bay window.  Oh boy.  This was the first room we saw.  Orange-red painted paneling, curling linoleum, and a hole in the wall.
Darker red walls.  Pretty new floor.  And a custom painted kitchen table.

Kitchen

It didn't get any better.  Ugly, dirty wood cabinets.  Pink formica counter tops and back splash, brown worn out cast iron sink.  The faucet was nice though.  And there is a stove and built in microwave.  Think of the potential!  We did live with this for a few months though.  And hosted a party with those counters still in tact.

The cabinets have all been painted black, hardware was moved to a new more normal location.  We got a fridge & dishwasher.  A new black acrylic sink was installed.  And we replaced those hideous counter tops with new black Formica and added a brushed nickle faux tin back splash.
Man, those floors make a huge difference.  They're so shiny, I just like to stare at them.

Living Room

So it has good bones.  It's huge.  And we love the vaulted ceilings.  You can tell I was ready to get to work with my vacuum and ladder.

Paint, new furniture, it's getting so much better!

A new dresser turned entertainment center and a 60" plasma TV replaced the old clunker of a TV that finally bit the dust.  And a pink chair...  Not my favorite, but it serves the purpose and sure is comfy.

From here you can see into the hallway.  You can also check out one of two barnwood doors.  My mom still hates these.
Some art, some pillows, a new lamp and we're making progress!

The fireplace end of the room.  Check out those movie theater style lights.  Oh, BTW, they plug in.

Man, oh man.  More new furniture.  Ugly doors have been removed.  Built ins and mantle got a new coat of paint.  And most importantly, those crazy light fixtures have been replaced!

Hallway

From here you can see the front door, it's missing part of its trim.  You can also check out that main wall that is red and tan crackle pain.  And you get a nice view of some paneling.  Oh boy.

We've added some art and an entry way table to drop keys and sunglasses on.  I have plans of replacing our old thermostat with a new one and then putting a frame around it for a little fun.

That's the bathroom door you see on the left, the linen closet you see at the end of the hall, the master bedroom and the office are on the right side of the hall.  Pretty pretty paneling.
The tan hall.  Very very tan.  It was just too tan.

I spent months debating on the right color to switch it up.  We finally settled on this airy turquoise.  I think it was the perfect choice.  And we added a gallery wall to cover up the non-functioning attic fan switch.

The parade of changes we made on one wall.  Originally I thought it would be fun to leave the stripes from the paneling.  And I hung up some homemade art.  Then I decided it was way too tan so I remade my art with a turquoise background but the same basic flour.  And then I decided the stripes I had to go.  I hated the stripes so I painstakingly painted them all tan.  Finally the top of the walls got painted that pretty pretty blue.  And I moved our wedding picture in the floating flame over.  Turns out I over estimated on the amount of space I had for my gallery wall.

Guest Bathroom

This was actually one of my favorite rooms.  I love that green tub!  The blue paint does nothing for it, but I love the green tub.  It was my inspiration.  BTW, that sticker is still in our shower over a year later.

We painted the walls grey.  In my head, I think of it as elephant grey.  And we decorated with grey and green to tie in our green tub.

 A coat of grey paint and some green and grey accessories made a world of difference!

This is the vanity.  No idea why the doors look totally different.  Or why there is only one door knob.  Weird.

The vanity got a fresh coat of paint.  We put on new green knobs that match the tub.

The upper cabinet.  There is only one door.  So strange.  That is also a kitchen light fixture you can see hanging down.  C'mon now.

That crazy lone door got ripped off.  I painted the inside of the cabinet the same color as the walls.  And the green baskets are for some nice hidden storage and the grey drawers hide my make up.

We put in a new sink and faucet, ripped out the weird extra mirrors and framed out the remaining mirror.

Office

Nothing terrible.  The walls are just blah.  Nothing a good coat of paint can't fix.


Master bedroom

It's kind of blurry but there was nothing terrible about it.  The ceiling fan was ugly.  Otherwise it just needed an new coat of paint.


 Master bathroom

This isn't a true before, I had already painted the shelf.  It had been the same color as the mirror was.

 Some bright turquoise paint for that beachy vibe we love.  *We really do put away our cleaning supplies.  I don't know what my problem is.

Guest bedroom

This room was so ugly!  Bright red paint and blue poster paint.  Sheesh.  

Laundry room

These people sure loved their faux finishes.  A sponge painted wall and paneling.  

 
 New appliances.  Pink paint.  A zebra print curtain.  Trim got painted a crisp white.  And we installed shelves over both the washer and dryer.

Basement

Basement Living Room

Yes, that's exactly as ugly as it looks.  There had been a wood burning stove at some point and they stuffed a dirty rag in the hole.  They also bricked in the fire place very badly.  And more paneling.

Super ugly and built out of paneling.  When we had our home inspection water came shooting out of the wall above the sink.  It was terrifying.  We got the water cut off and also cut off the gas to the stove.
The walls got painted green.  I painted the bar a glossy white (to cover up the paneling.... yes, the bar is made out of paneling)

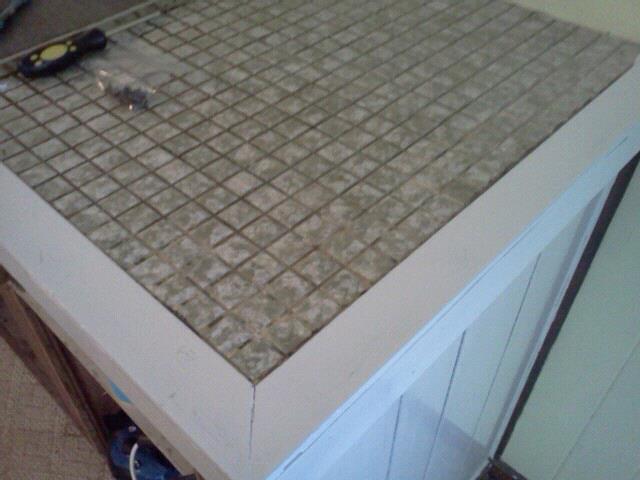
A close up of the bar top before and after.  The green tile is not my favorite but painting the walls green definitely helps.  And the white bar made the room so much lighter.

What has to be the world's smalles ceiling fan.  The fixture itself got painted silver.  And the fan blades got a nice coat of dark grey spray paint.  And now it looks brand new.

Basement Bedroom

We fondly refer to this as the Tupac room.  It was red with black spray paint.  Specifically Tupac spray painted on the walls.  This was one of the ugliest rooms.

Another view of this super attractive room.  With a very low hanging ceiling fan.

Three coats of Kilz.  And some black and gold stripes for a little Mizzou pride.  We still need to add baseboards.

Basement Bathroom

This picture does not do it justice.  When we bought the house the walls were bright blue and the ceiling was light blue.  It was quite amazing.  The floor was also just bare concrete.
My sweet husband did three coats of Kilz in here as well, on both the walls and the ceiling.  And we painted the same kind of stripes as the bedroom but in red and yellow for a little Chiefs pizzazz.  We also put down black adhesive tiles.  Probably not great for the long haul but it served the immediate flooring problem.

Red and yellow towels top off the Chiefs decor.